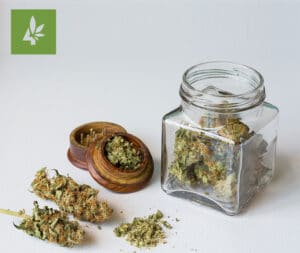


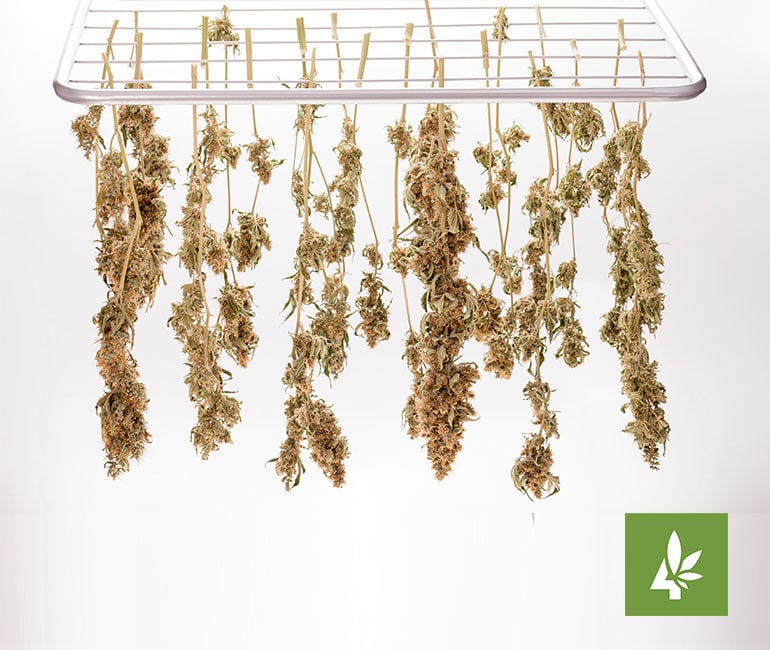
After your cannabis is dried and processed, it’s time to think about curing, burping, and re-humidifying your crop to the perfect smoking and vaping consistency. Unlike drying, the process of curing cannabis involves slowly aging flowers in airtight containers to help seal in unique flavors and aromas. Much like the process of aging fine wine or spirits, curing cannabis for only a few weeks has the potential to unlock some of your crop’s most desirable qualities. For the best outcome during this important stage, follow the article below for tips every grower should know when curing cannabis.
Why Cure Cannabis?
Unlike drying, which is simply the process of removing moisture from cannabis, curing is a procedure of long-term storage that helps flavors, aromas, and terpenes reach their full potential. Curing time varies from grower to grower, and can last anywhere from a few weeks to several months depending on the desired outcome. In ideal circumstances, properly cured cannabis can elevate the outcome of a harvest, leading to tighter flowers and more intense flavors and aromas.
How to Cure Cannabis Step-by-Step
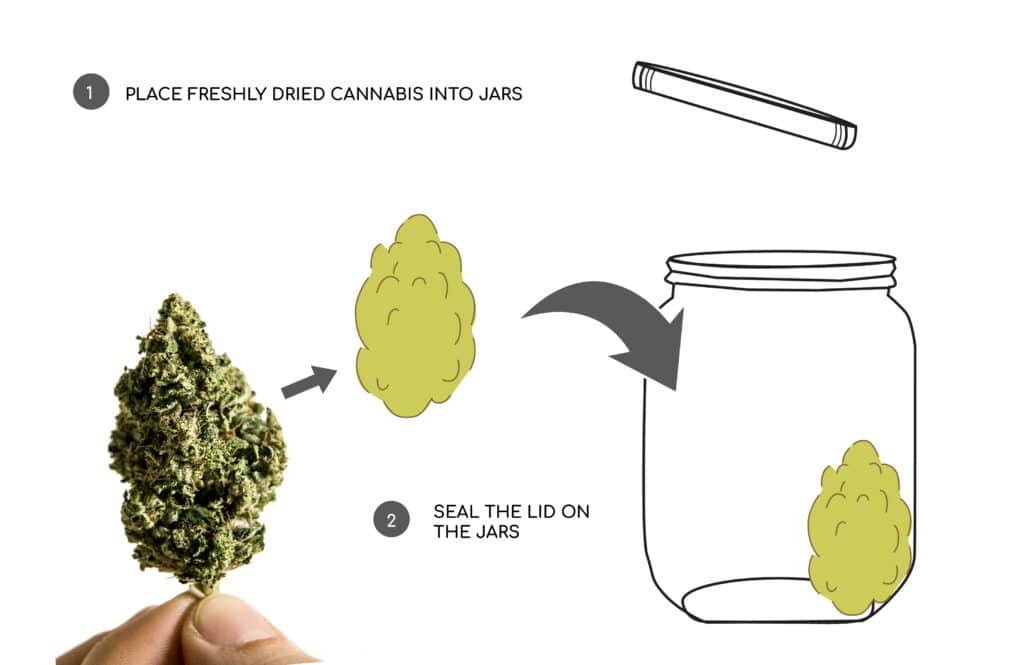
Step #1: Place Freshly Dried Cannabis into Jars
Begin the curing process by placing freshly dried and trimmed cannabis into airtight jars. The curing process can only take place once the gasses trapped inside cannabis flowers have an opportunity to swell, contract, and marinate in a sealed environment. Putting cannabis in mason jars is a great and inexpensive way to provide cannabis with a controlled, airtight environment during the curing process. To begin, place your flowers into these jars and seal the lid.
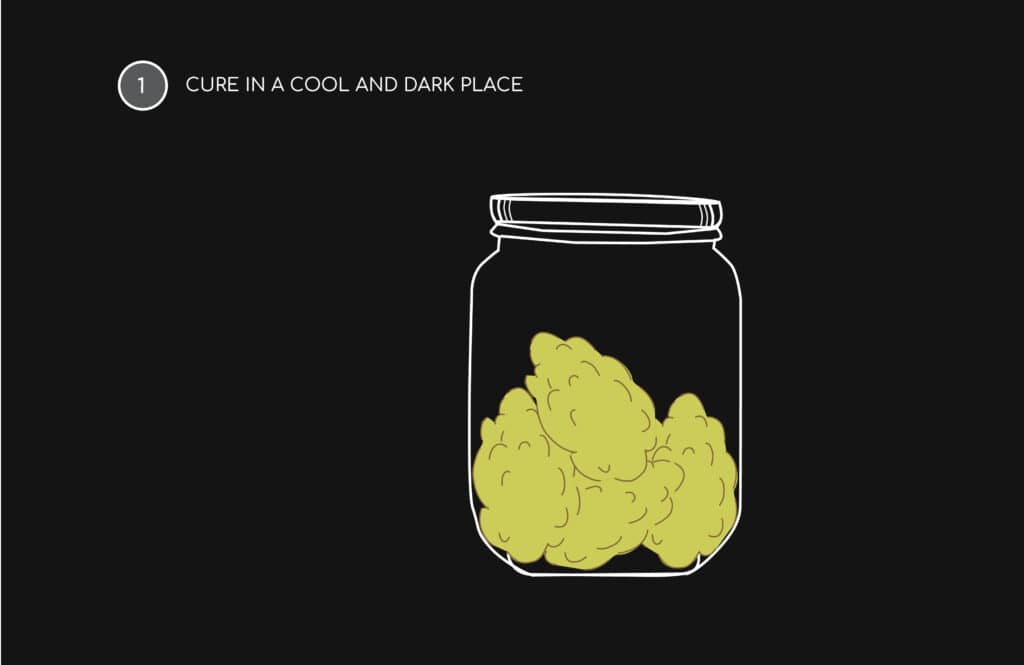
Step #2: Cure in Cool, Dark Place
Curing a crop in a cool and dark place is an industry standard. Not only will a light source release heat, something that can be detrimental to dried cannabis flowers, but it can also emit small/large amounts of photosynthetic radiation (PAR). At high levels over long periods of time, PAR produced by a light source has the potential to damage the delicate trichomes of curing flowers. And so, while it is a good idea to continually monitor your crop, keeping your cannabis in complete darkness over the curing period will ensure your crop remains delicious and desirable.
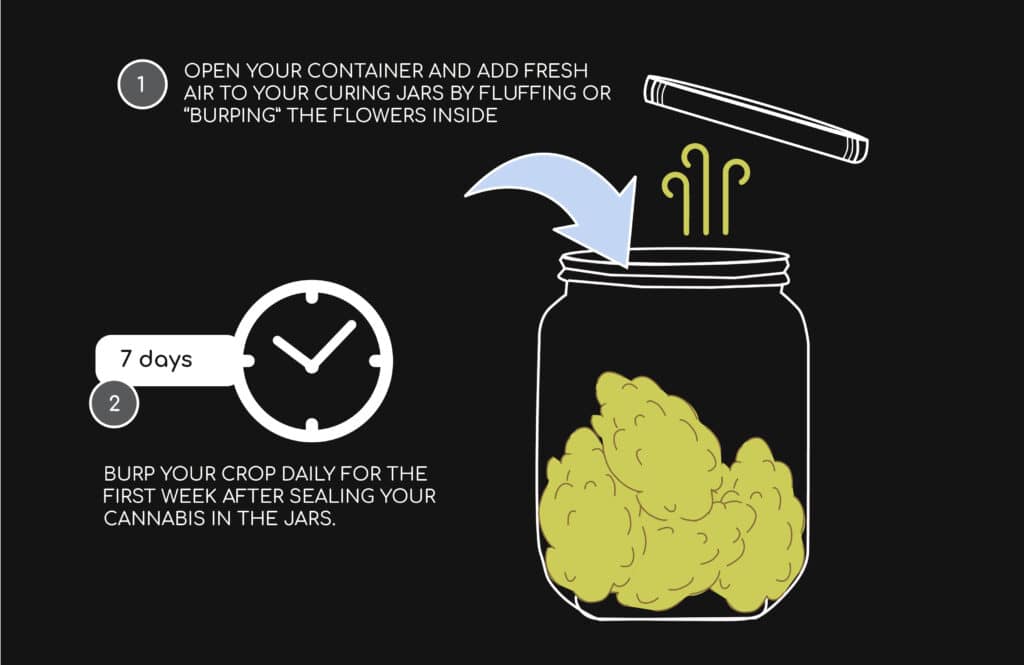
Step #3: “Burb” Your Crop Daily
An oxygenation process called “burping” may also be useful during this stage. To fight the build-up of excess humidity, open your container and add fresh air to your curing jars by fluffing or “burping” the flowers inside. Burping your crop daily will cause an instant air exchange, allowing stale air and moisture to be removed from the mason jar. For the best possible cure, burp your crop daily for the first week after sealing your cannabis in jars. And remember, do not rush the curing process! Instead, treat your crop like an aging barrel of fine wine; you’ll be amazed at the subtle aromas and flavors that develop over a two-week period.
Step #4: Re-humidify Your Cannabis
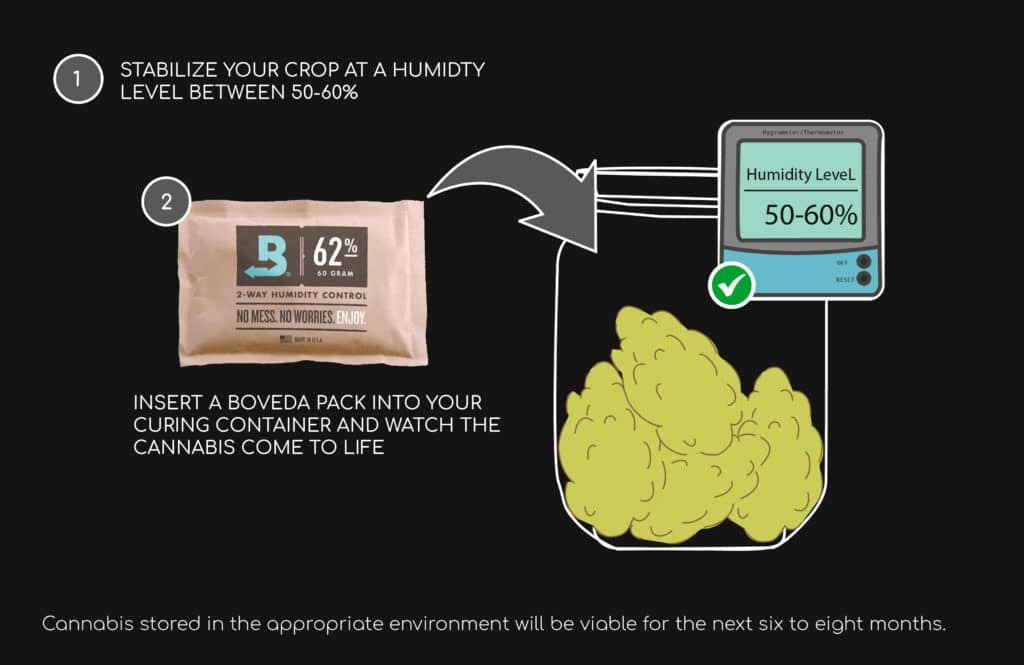
If desired, the curing process can continue for several months. So, to maintain flowers with an ideal smoking humidity, consider re-humidifying your cannabis with 2-way humidity packs. Just as high-quality cigars should be kept in a humidor, cannabis kept in a slightly humid environment will evoke desirable tastes, aromas, and sensations. So, before consuming your successfully dried and cured flower, attempt to stabilize your crop at a humidity level between 50-60%.
Boveda makes some of the industry’s most reliable humidity packs. Simply insert your Boveda pack into your curing container and watch your cannabis come to life. Cannabis stored in the appropriate environment will be viable for the next six to eight months.
Congratulations on growing cannabis at home! Join us for more information about growing cannabis at home. For more tips on curing cannabis, contact our team at Grow Your Four.
Read More
- Tips on Curing Homegrown Cannabis
 After your cannabis is dried and processed, it’s time to think about curing, burping, and re-humidifying your crop to the perfect smoking and vaping consistency. Unlike drying, the process of curing cannabis involves slowly aging flowers in airtight containers to help seal in unique flavors and aromas. Much like the process of aging fine wine
 - How to Trim Cannabis to Perfection in 7 Easy Steps
 It’s true – trimming cannabis is one of the most monotonous jobs in the garden. But much the like process of knitting handmade fabrics, hand-trimming your crop is a special and necessary part of cultivation. Not only does hand-trimmed cannabis deliver a superior cut, but each flower during the hand-trimming process goes through an individual
 - Grow Your Four’s Guide to Harvesting and Drying Cannabis
 By the end of week 8, your plants will likely be ready for harvest. Harvesting cannabis involves the important process of carefully drying plants to preserve and protect unique flavors and aromas. Much like the process of aging fine wine, carefully drying your crop has the potential to exaggerate the nose and taste of homegrown