
By the end of week 8, your plants will likely be ready for harvest. Harvesting cannabis involves the important process of carefully drying plants to preserve and protect unique flavors and aromas. Much like the process of aging fine wine, carefully drying your crop has the potential to exaggerate the nose and taste of homegrown cannabis. If you’re ready to harvest your crop, read the passages below for our guide on harvesting and drying cannabis.
The Importance of Carefully Harvesting and Drying Cannabis
Carefully harvesting and drying your crop can help accomplish the goal of producing top-tier cannabis. Fully developed cannabis flowers are prone to bruising; so, plants must be diligently handled during harvest to avoid unwanted damage. Also, specific environmental parameters must be put in place during the drying process to protect flowers, influence moisture release, and exaggerate flavors and aromas. Follow the steps below to learn more about carefully harvesting and drying your cannabis crop.
Grow Your Four’s Guide to Harvesting and Drying Cannabis
Step #1: Determine if Your Plants are Ready to Harvest
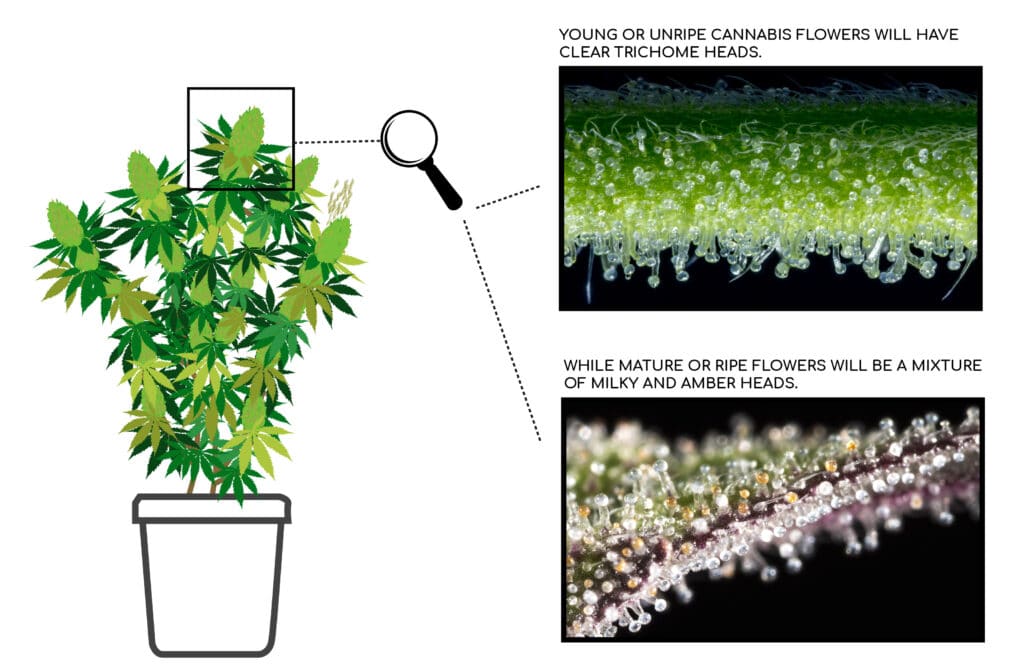
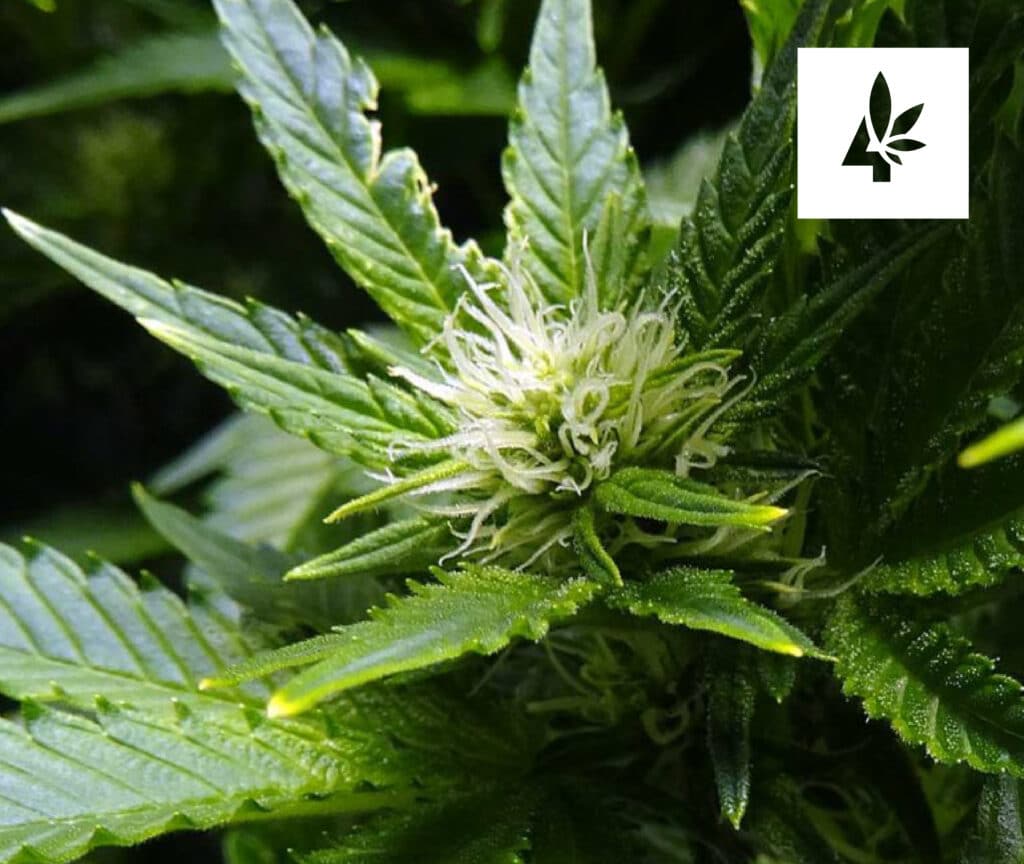
The easiest way to determine if your crop is ready for harvest is by examining cannabis trichome heads. Young or unripe cannabis flowers will have clear trichome heads, while mature or ripe flowers will be a mixture of milky and amber heads. Magnifying glasses, jeweler’s loupes, handheld microscopes, and mobile phone microscopes can all be used to examine trichome heads. For the most potent and complex cannabis, it’s highly recommended that growers harvest their plants once ⅓ of all inspected trichomes are amber.
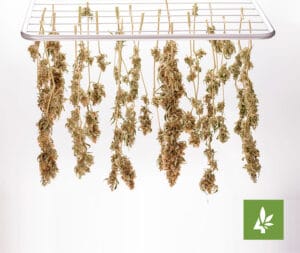
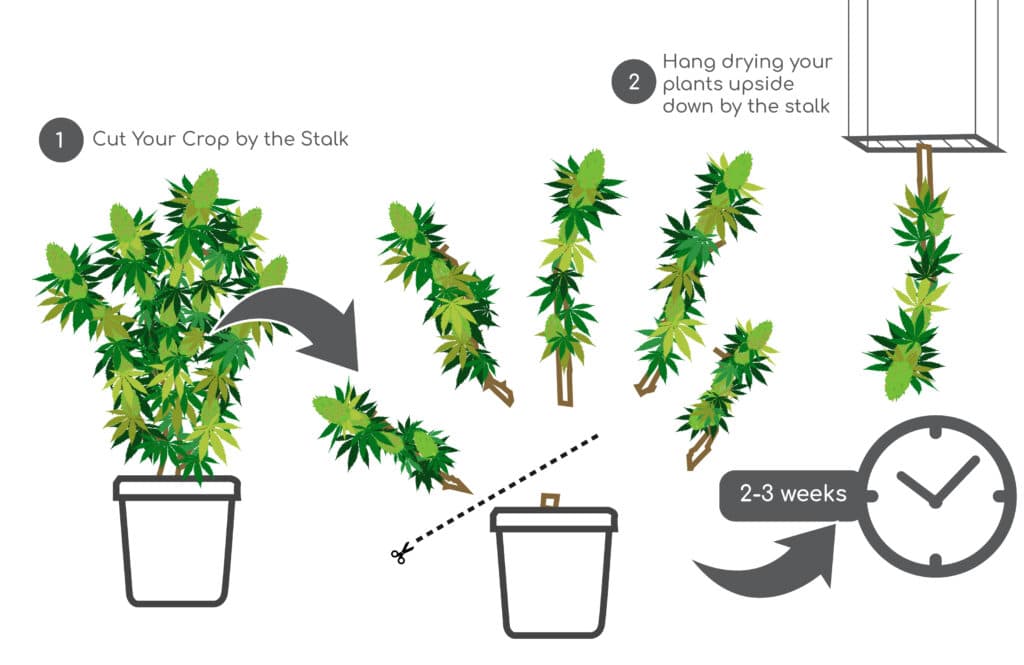
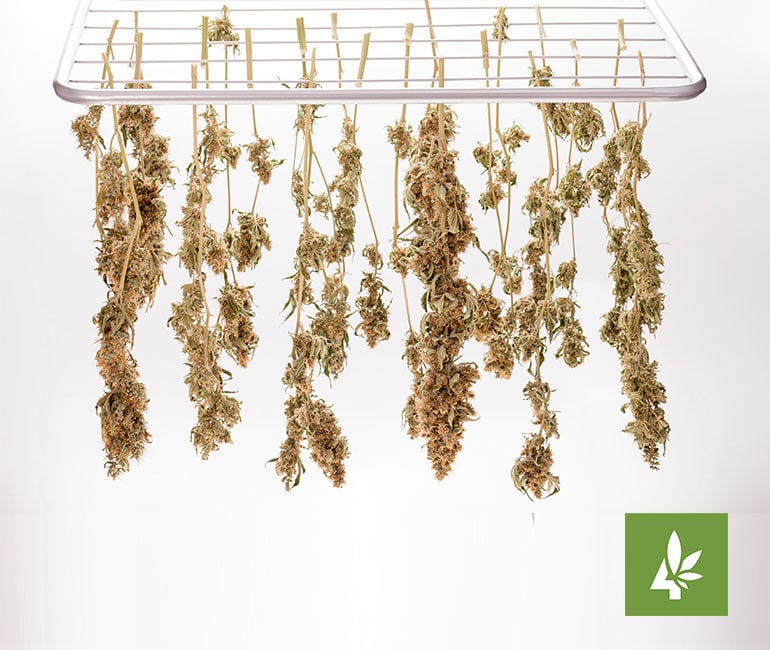
Step #2: Cut Your Crop by the Stalk and Hang Upside Down
Hang drying your plants upside down by the stalk forces the remaining moisture and chlorophyll within the plant to continue to circulate, causing a slower, more evenly dried plant. Fast-drying cannabis is not recommended, as it can often lead to a tasteless, harsh smoke. So, to ensure your crop is dried to perfection, hang your plants upside down and allow your flowers to slowly dry over the next few weeks. Hang drying your crop is also a great method to ensure your flowers remain undamaged by the harvesting process. While it may be easier to trim wet cannabis, handling moist flowers can easily lead to squished or bruised buds.
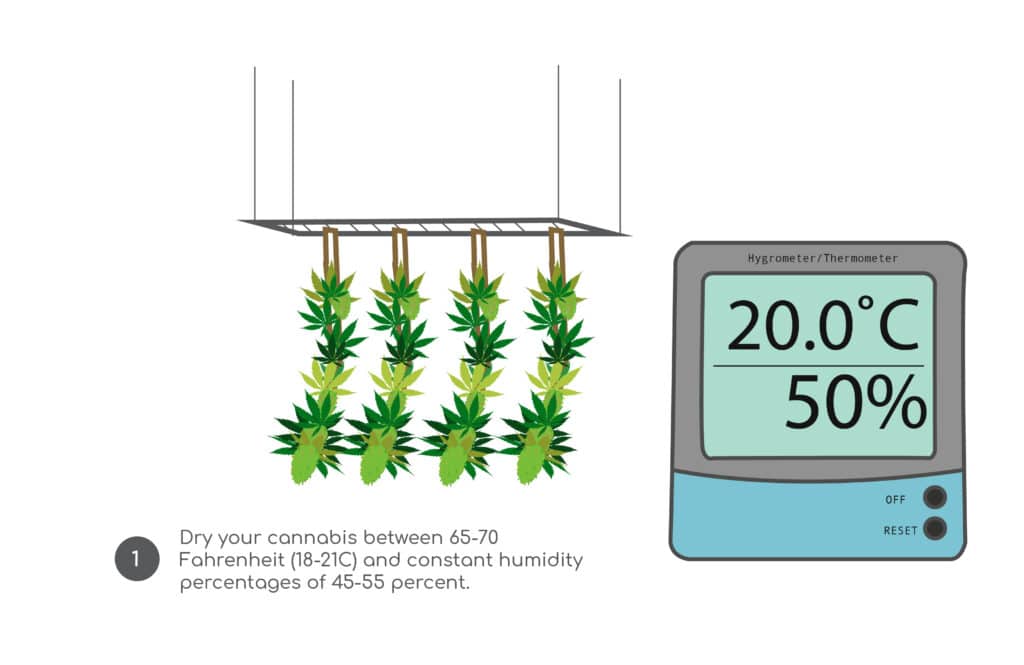
Step #3: Monitor Temperature and Humidity Levels
Drying cannabis has the best opportunity to develop intense and interesting flavors and aromas at temperatures between 65-70 Fahrenheit (18-21C) and constant humidity percentages of 45-55 percent. Flowers drying above or below these requirements can either dry too fast and fail to develop a unique aroma or dry too slow and be at risk for mold and mildew contamination. For the best chance at maintaining a consistent environment, attempt to stabilize your drying room with temperature controls like air movement, ventilation, and/or (de)humidification.
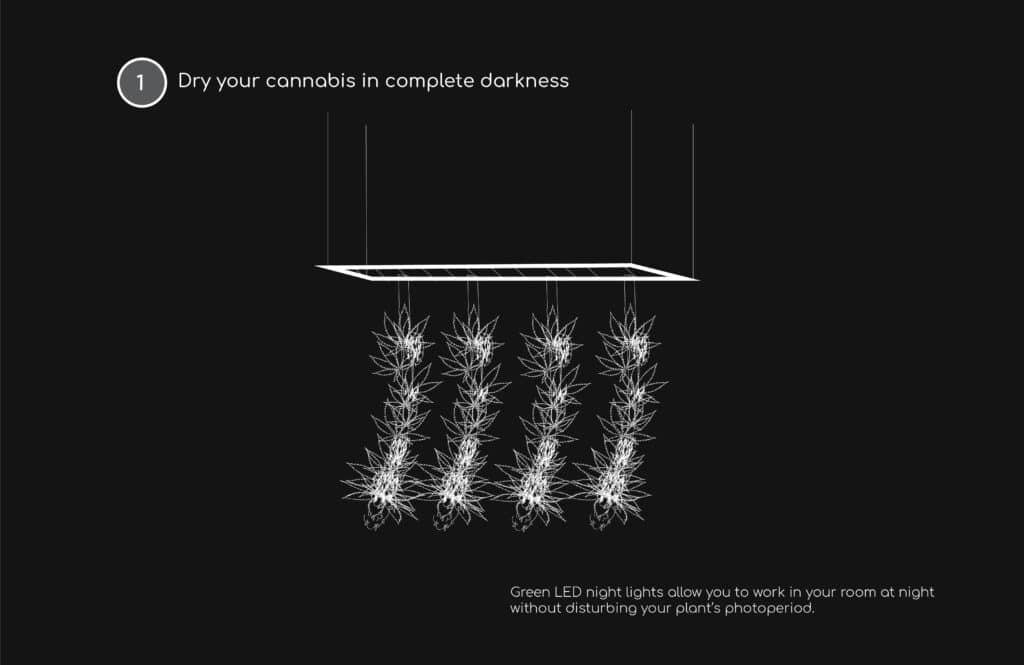
Step #4: Dry Cannabis in Complete Darkness
Drying cannabis in complete darkness is an industry-standard. Not only will horticultural lighting release heat, something that can be detrimental to a drying harvest, but it can also emit small/large amounts of photosynthetic radiation (PAR). At high levels over long periods of time, PAR produced by a light source has the potential to damage the delicate trichomes of drying flowers. And so, while it is a good idea to continually monitor your crop, keeping your room in complete darkness over the drying period will ensure the outcome of your garden remains delicious and desirable.
Green LED night lights allow you to work in your room at night without disturbing your plant’s photoperiod.
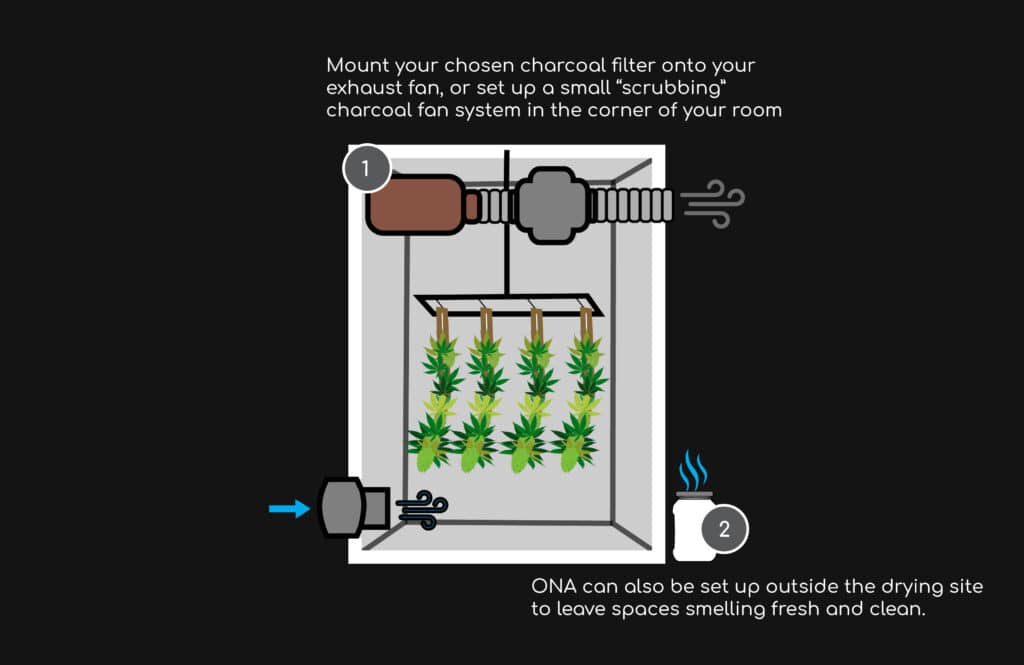
Step #5: Control Odor
Cannabis is at its most pungent when drying. If you’re concerned about the odor produced by drying cannabis, consider setting up odor-controlling equipment inside and outside the drying room to contain the powerful odors produced by this process. Charcoal filtration systems, for instance, have quickly become a favorite piece of equipment chosen to manage odor. Just mount your chosen charcoal filter onto your exhaust fan, or set up a small “scrubbing” charcoal fan system in the corner of your room. The fan pulls air from your room into your charcoal filter, but before it leaves your drying space, it will first become trapped in the porous, odor-absorbing crevices of the carbon filter.
Odor neutralizing agents like ONA can also be set up outside the drying site to leave spaces smelling fresh and clean. Place a bucket or jar of ONA directly outside the drying room to catch any unwanted odors. To speed up the process of neutralization, ONA-specific “Breeze Fans” can be attached to containers to distribute ONA across open spaces evenly.
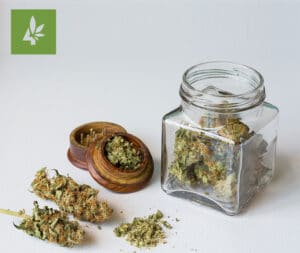
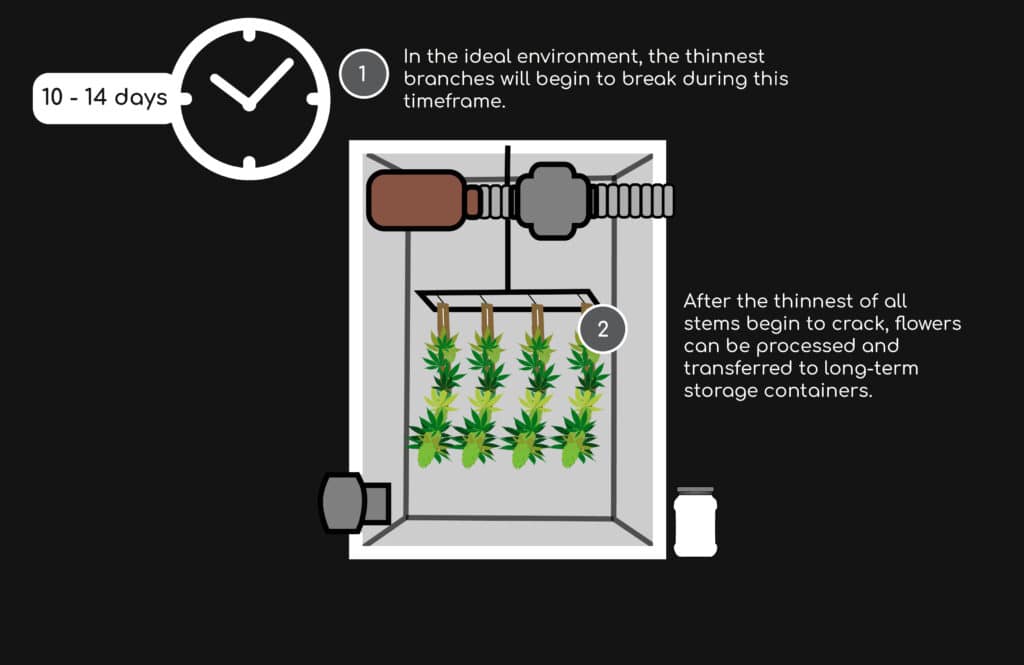
Step #6: Dry for 10-14 Days
Since your hang drying your plants, test the flexibility of the stalk and branches of your crop after 10-14 days. In the ideal environment, the thinnest branches will begin to break during this timeframe. After the thinnest of all stems begin to crack, flowers can be processed and transferred to long-term storage containers. Read our next blog for tips and advice on trimming and curing cannabis.
Congratulations on growing cannabis at home! Join us for more information about growing cannabis at home. For more tips on trimming cannabis, contact our team at Grow Your Four.

Read More
- Tips on Curing Homegrown Cannabis
 After your cannabis is dried and processed, it’s time to think about curing, burping, and re-humidifying your crop to the perfect smoking and vaping consistency. Unlike drying, the process of curing cannabis involves slowly aging flowers in airtight containers to help seal in unique flavors and aromas. Much like the process of aging fine wine
 - How to Trim Cannabis to Perfection in 7 Easy Steps
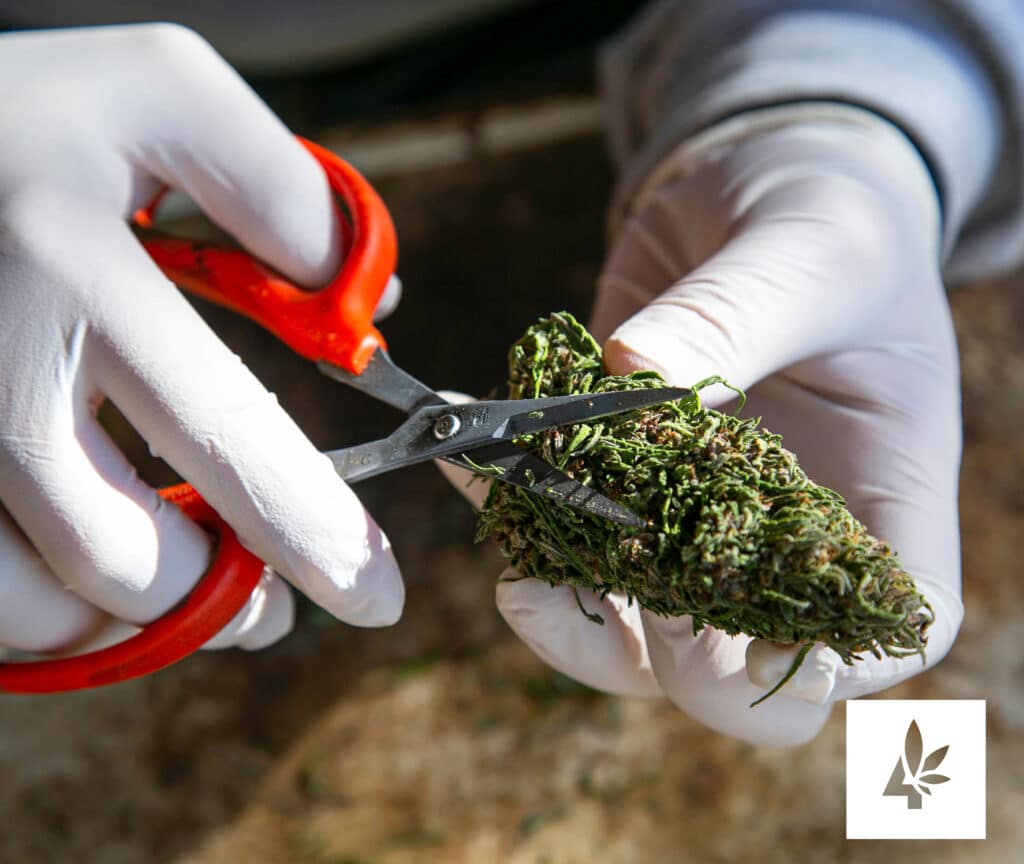 It’s true – trimming cannabis is one of the most monotonous jobs in the garden. But much the like process of knitting handmade fabrics, hand-trimming your crop is a special and necessary part of cultivation. Not only does hand-trimmed cannabis deliver a superior cut, but each flower during the hand-trimming process goes through an individual
 - Grow Your Four’s Guide to Harvesting and Drying Cannabis
 By the end of week 8, your plants will likely be ready for harvest. Harvesting cannabis involves the important process of carefully drying plants to preserve and protect unique flavors and aromas. Much like the process of aging fine wine, carefully drying your crop has the potential to exaggerate the nose and taste of homegrown
 - How to Enhance Your Crop in Late-Flower (Weeks 6-8)
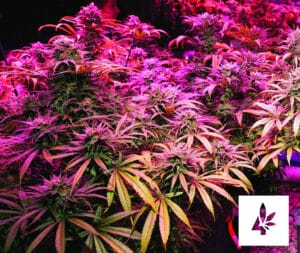
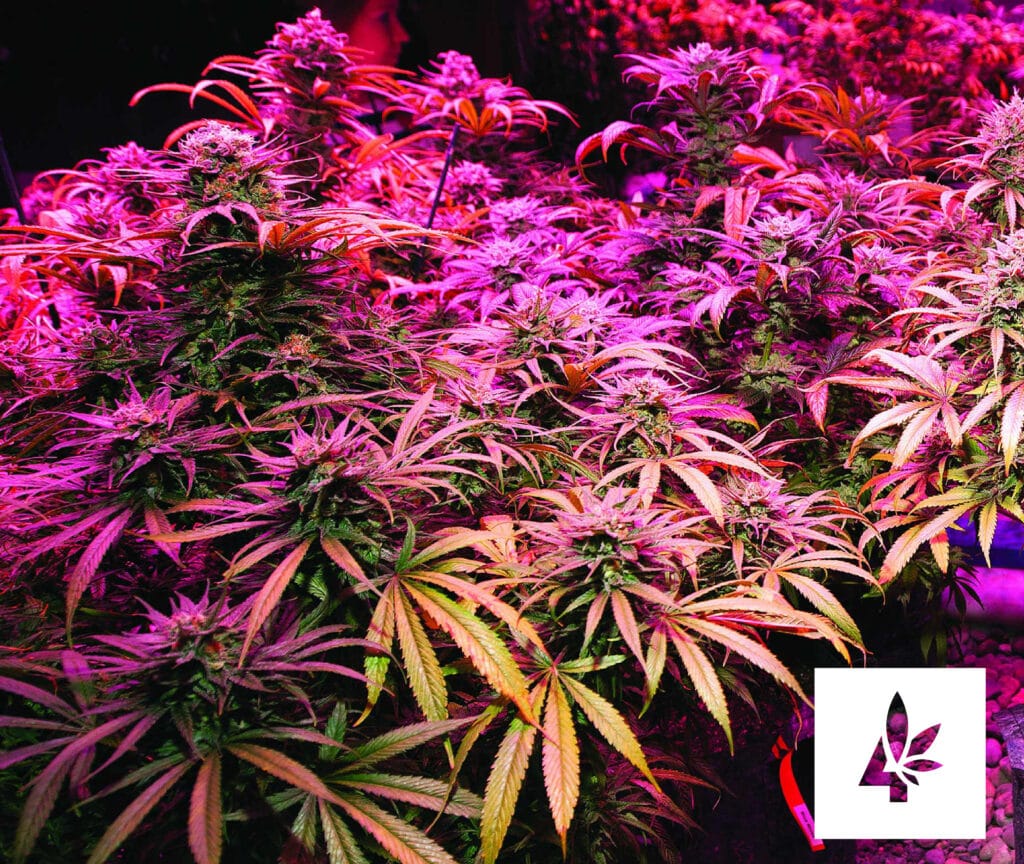 By week six, your crop’s flowers will have reached their full size. While your plants may look and smell amazing, the show is far from over. Over the next two weeks, the resin glands and flowering hairs of your plants will slowly begin to deteriorate, adding new colors, flavors, aromas, and psychoactive effects. This is
 - Tips on Transitioning Cannabis Plants into the Flowering Stage
 If you’re happy with your cannabis plant’s size, it might be time to transition them into the flowering stage. Cannabis plants are photoperiod-dependant. This means the growth patterns of cannabis plants are influenced by the amount of light they receive. For instance, growers can regulate vegetative growth by giving cannabis plants 18 or more hours