There are three ways to begin growing cannabis at home: start from seed, take cuttings, or import genetics as fully established plants. Each option has its pros and cons; however, starting cannabis plants from seed is arguably the safest and most fulfilling process for beginners.

Germinating seeds can be time-consuming, but unlike the other options above, starting cannabis plants from seed allows growers to have complete control over the genetics that enter the garden. You never know, those LA Confidential plants you got might actually be OG Kush. Or worse, the genetics you imported may be carrying dormant diseases, pathogens or pests. If you’re the type of person who likes to play it safe, especially in a new venture, consider starting your cannabis plants from seed as opposed to any other option.
Ready to get growing? Watch our YouTube Series or read the following passages to learn more about germinating cannabis seeds.
How to Germinate Cannabis Seeds
Step #1: Obtain Seeds
Since you’ll be spending weeks cultivating cannabis at home, consider researching the characteristics of the type of plant you’ll be growing. Cannabis genetics are divided into three categories: Indica, Sativa, and Hybrid. Indica’s tend to be low-growing, bushy plants with large, broad leaves; they also tend to be hyper-resistant to disease and undesirable temperatures. Sativa strains are quite the opposite, growing large with thin leaves and branchy stalks. They are also extremely heavy producers and may require more care and attention as opposed to other genetic profiles. Hybrids can be a blend of both genetic worlds, but they might lean more towards one profile than the other.

Long Skinny Leaves

Large Broad Leaves

Blend Of Both Genetics
Here are some of the most important plant characteristics to consider before settling on a genetic profile:
- Flowering Time: The time it takes for a cannabis plant to reach maturity during the flowering stage.
- Plant Size: Some plants grow wider and taller than others. Research the approximate size of the plants you might be caring for and make sure that your growing space will be able to accommodate the width and height of four plants.
- Cultivation Information: Look at what experienced growers have done in the past to cultivate similar genetics. Tips and advice may range from nutrient requirements, bending and scrogging techniques or other cultivation requirements like lighting, environmental preferences and potential yield.
- Cannabinoid Content: Review the cannabinoid content of your genetic lineup. Some plants have higher levels of THC and/or CBD. Since your going to be invested in cultivating cannabis at home, why not grow what you love!
- Terpene Profile: Terps are responsible not only for the taste and aroma of fruits and flowers but also the “effects” of plant material when consumed. Cannabis terpenes range drastically from plant to plant and can influence feelings of well-being, sedation, relaxation, creativity and focus. Choose a plant with a terpene profile that suits your own preferences in both taste and sensation
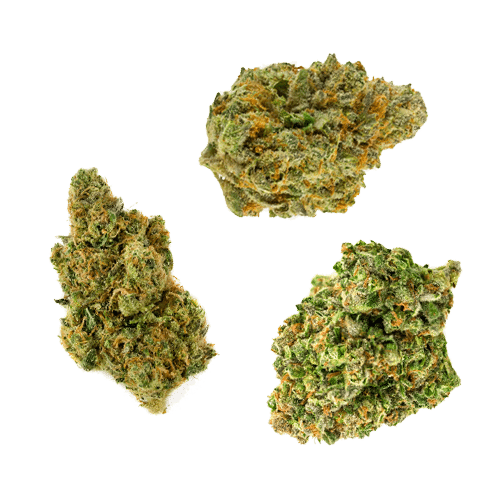
Need help researching strains? Try starting on Leafly. The catalogue of strain information is massive and well documented; even better, Leafly allows you to filter search results based on plant type, feelings and popularity. Click here to view Leafly’s entire catalogue of strains.
Types of Cannabis Seeds
There are typically three types of cannabis seeds available for purchase: non-feminized, feminized and autoflower seeds. Below we will discuss the advantages and disadvantages of each seed type:

Non-feminized
Non-feminized or “regular” seeds are characteristically identical to other types of seeds; however, since non-feminized seeds come from the crossing between a female (XX) and a male (XY), their genetic information contains both sexes, and they will show one or the other sex depending on several factors. In other words, in a pack of 4 non-feminized seeds, it’s quite likely that half of the plants will be male and the other half female. So, if you’re interested in only cultivating the flowers produced by female plants, investing in non-feminized seeds may be a risk not worth taking.

Feminized
Feminized seeds only contain the female chromosome (XX), so they are almost guaranteed to be female. The process of creating feminized seeds involves crossing two female plants, instead of one male and one female plant. Because feminized seeds are usually of high genetic quality and involve no plant sexing, they are the perfect option for new growers.

AutoFlower
Unlike the two plant types above, autoflowering seeds do not require a change in photoperiod to produce flowers. In short, autoflowers produce flowers automatically – hence the name autoflower. In some cases, plants can even reach full maturity in 60 days. This is a great option for growers who want a quick turnaround or want to experiment with different types of genetics. However, autoflowering plants are not without their downsides. For example, since you can’t control the size of your plant, growers can expect a slight decrease in yield, as opposed to feminized or regular cannabis plants. Also, since there is no vegetative period, autoflower’s should not attempt to be cloned, scrogged, or trained during their lifecycle.
All AutoFlowers are feminized. Since males produce pollen and females produce flowers, the name autoflower indicates female plants that flower automatically. Autoflowers can only be female since they produce flowers and not pollen.
Grow Your Four
Pros of Autoflowering Seeds:


Cons of Autoflowering Seeds:


To purchase cannabis seeds, browse a collection of genetics through the BC Cannabis Store. Once you’ve obtained your choice of seeds, it’s time to begin germination.
Step #2: Scarring Cannabis Seeds
Scarring cannabis seeds or seed scarification is the action of gentle scratching the hard outer shell of a seed in order to speed up the germination process. Scarification is a good option to consider, especially if the seeds you happened to purchase are older than six months. All different types of seeds can undergo scarring; cannabis seeds, however, given their extremely tough shell, arguably have the most to gain. After scarring, even the oldest seeds will have an increased success rate and speed during germination. There are three popular methods of seed scarification:

Sand Paper: Probably the easiest method for beginners. Use a section of fine-grain sandpaper to scratch the outer shell of the seed – do not scar the hold seed, just a small section of the top or bottom. Scratch until scars are visible, or the fleshy part of the seed appears.

Metal File: Depending on the size and thickness of the outer shell, a fine-grain metal file may be necessary to scar the seed. Follow the same process of scarification above with this tool.

Nail Clippers: Nail clippers can also be used to chip away at the outer shell of the seed before germination, however, this is probably the most advanced method of scarring. Use the nail clippers to clip off a section of the shell at the bottom of the seed. While this process does increase the success rate of germination, new growers should be cautious of this method, as there is always the possibility of killing or damaging the seed.
Step #3: Soak Seeds
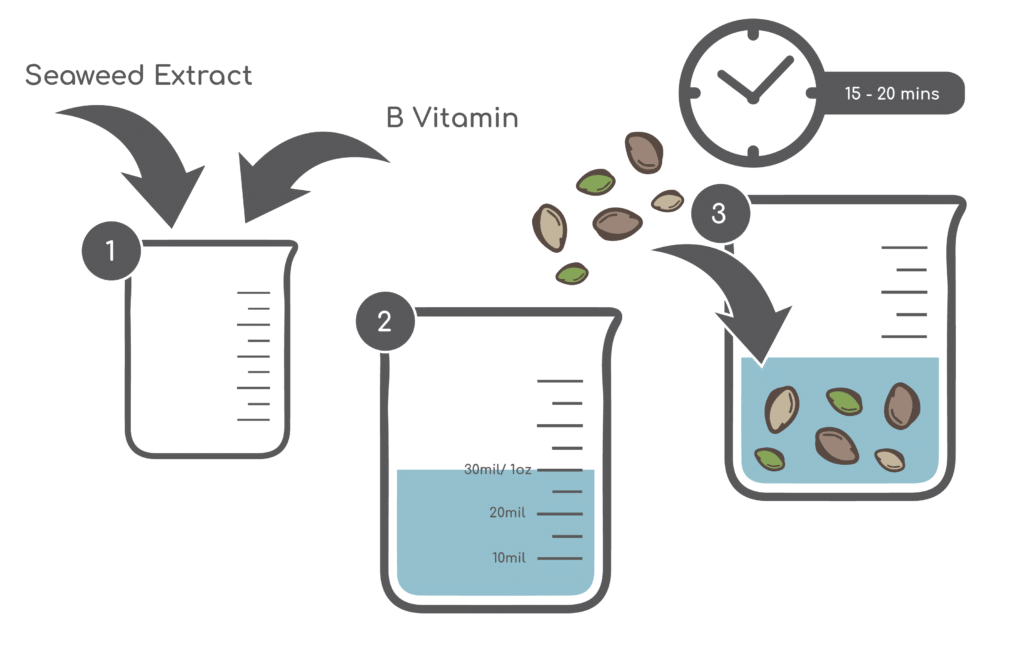
After scarring your seeds it’s time to soak them; first in a bath or nutrient solution, and later in a damp paper towel. For successful germination, seeds require a few things: moisture (humidity), darkness, and nutrients. For the best success, prepare a nutrient solution of B vitamin and seaweed extract. B vitamins reduce plant stress during transition phases of growth, promote root development and usually contain absorbable elements like potassium. Seaweed extract contains naturally occurring plant hormones like auxins and cytokines and helps to speed up growth processes like root expansion. Since you’re only soaking a few seeds, only one ounce or less of nutrient solution is required. Follow the directions for mixing on the back of each nutrient supplement. After this nutrient solution is prepared, toss your seeds in for a 15-20 minutes soak. When using older seeds, consider leaving them in overnight for the best success rate.
Step #4: Paper Towel Germination
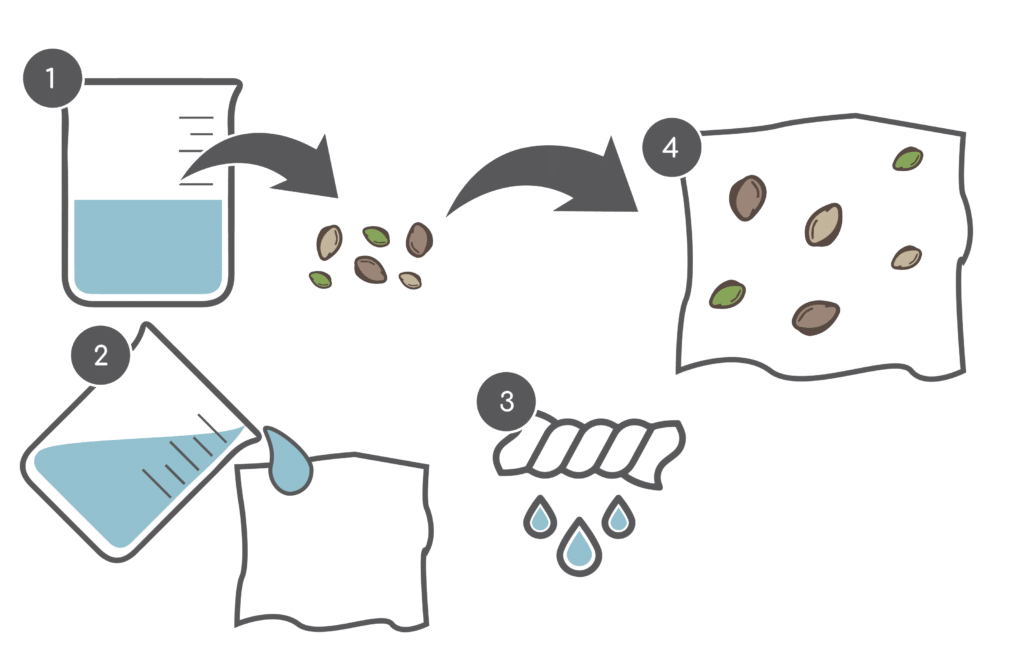
After their bath, take each seed out and place them to the side. Then, soak a section of paper towel with the leftover nutrient solution. Afterwards, wring the excess water and nutrient solution out of the paper towel. The goal of this process is not to create a soaking wet environment for your seeds, but rather provide them a space with high levels of humidity. Finally, place each seed in the center of the paper towel and cover them with the adjacent end.
Step #5: Germination Storage
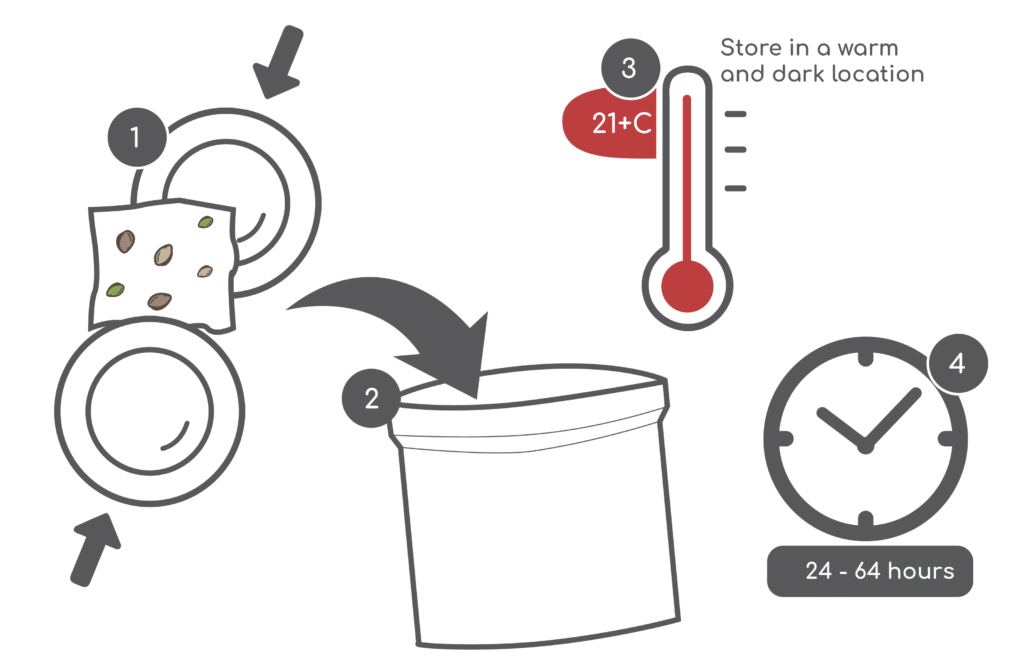
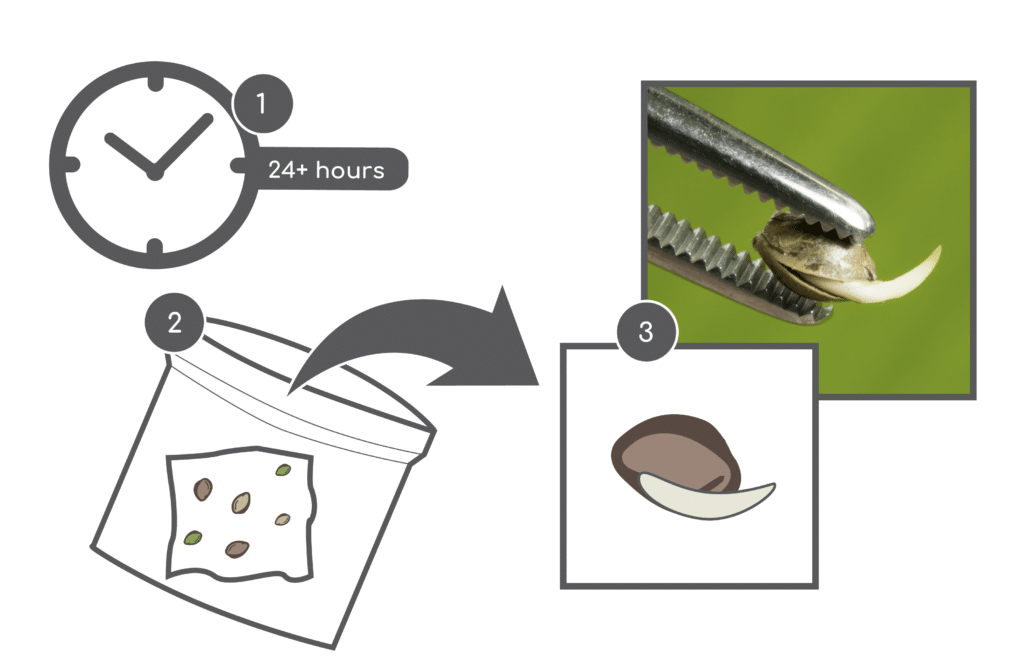
Depending on factors such as age and genetic strength, seed germination can take anywhere from 24 hours to a few days. To provide your seeds with an ideal environment, store them in a warm and completely dark environment. Place the paper towel and seeds in a plastic bag and then between two plates. This short-term storage vessel can be placed on top of a fridge, or, in a kitchen cupboard above the stove – anywhere in the home where temperatures will not drop below 70 degrees Fahrenheit (21C).
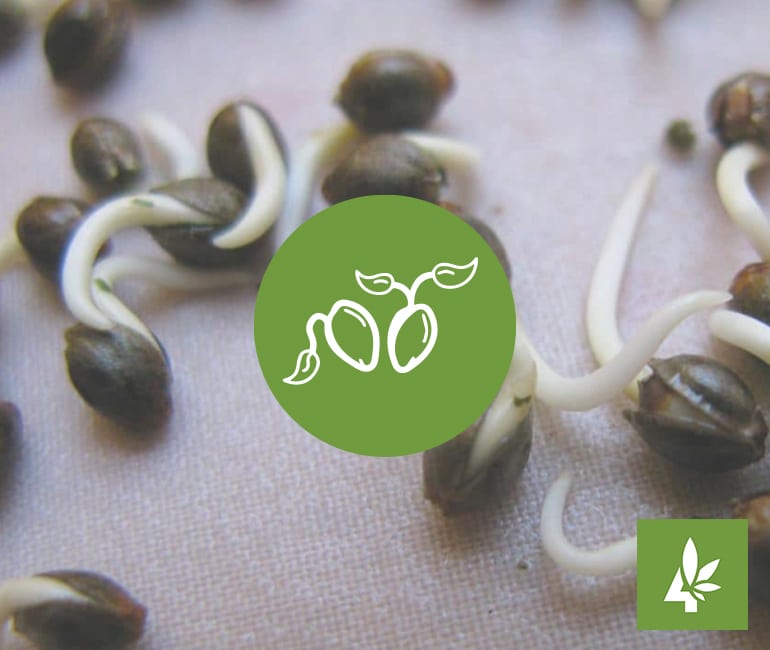
Step #6: Determine Germination Success
Following steps #1-6 can give even the most inexperienced growers a great chance at successfully germinating cannabis seeds. After giving your seeds at least 24 hours to germinate, open the plastic bag and examine each specimen. Successfully germinated seeds will have a large root exiting the top or bottom of the shell called the “tap-root”. If you do not notice a tap root within 24 hours, don’t panic, just place the seeds back into their germination container and continue to examine their progress daily. You can determine the “success rate” of the germination process by counting successful sprouts and dividing them by the total number of seeds. For example, if 3 out of 4 seeds hatched, your germination success rate was 75%.
Congratulations on starting your cannabis-growing journey with us. For more information on starting your cannabis plants from seed, please contact the team at Grow Your Four.
Read More
- Tips on Curing Homegrown CannabisAfter your cannabis is dried and processed, it’s time to think about curing, burping, and re-humidifying your crop to the perfect smoking and vaping consistency. Unlike drying, the process of curing cannabis involves slowly aging flowers in airtight containers to help seal in unique flavors and aromas. Much like the process of
- How to Trim Cannabis to Perfection in 7 Easy StepsIt’s true – trimming cannabis is one of the most monotonous jobs in the garden. But much the like process of knitting handmade fabrics, hand-trimming your crop is a special and necessary part of cultivation. Not only does hand-trimmed cannabis deliver a superior cut, but each flower during the hand-trimming process goes
- Grow Your Four’s Guide to Harvesting and Drying CannabisBy the end of week 8, your plants will likely be ready for harvest. Harvesting cannabis involves the important process of carefully drying plants to preserve and protect unique flavors and aromas. Much like the process of aging fine wine, carefully drying your crop has the potential to exaggerate the nose and

